☕ Key takeaways
- Six variables build a shot: dose (18 to 21 g in a double basket), ratio (1:2 by weight, so 18 g in for 36 g out), grind, temperature (92 to 96 °C), time (25 to 35 seconds) and pressure (9 bar at the puck).
- Diagnosis starts with extraction time: too short (< 20 s) → grind finer; too long (> 35 s) → grind coarser, change only one variable at a time.
- A scale under the portafilter is the single most impactful upgrade for home espresso: the coffee-to-liquid weight ratio is the only objective indicator of extraction quality.
Home Espresso Guide: Dose, Grind, Extraction, Ratio
3 key takeaways

- Espresso forces 18 g of coffee into 36 g of liquid in about thirty seconds, which is why every variable pushes on all the others.
- The SCA definition of espresso puts brew water between 90.5 and 96 °C at the point of contact, and 92 to 94 °C suits most espresso blends.
- Nine bar applies at the puck, not at the pump: the 15 bar advertised on many home machines is an unloaded figure that says nothing about your shot.
Starting out: a compact pump machine such as the Sage Bambino Plus, paired with a burr grinder that really reaches espresso fineness, the Baratza Encore ESP for instance. Budget roughly €550 to €650 for the pair, order-of-magnitude prices seen in September 2026.
Skipping ahead: an all-in-one such as the Sage Barista Express Impress, with its integrated conical burr grinder and assisted tamping, around €600 to €650 at the same date.
Home espresso can feel intimidating. The variables are many, the margin for error is narrow, and a single miscalibrated step can turn a promising shot into a disappointing cup. But espresso is also the most fully documented brewing method in coffee, every variable is measurable, every outcome traceable. Once you understand what each parameter does and how they interact, you have a reliable system for dialling in any coffee, on any machine, every morning. This guide walks you through all six key variables, a step-by-step method and a complete troubleshooting table.
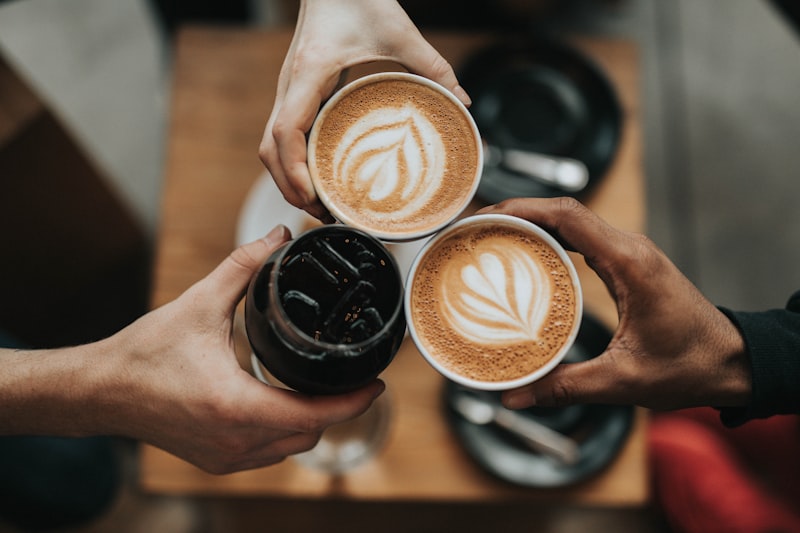
Which six variables decide how your espresso tastes?
Ready to choose? → See our comparison and current prices
1. Dose
The dose is the weight of ground coffee loaded into the portafilter basket. A standard double basket takes 18-21 g depending on the manufacturer. Weigh to 0.1 g precision, a 0.5 g variation changes extraction noticeably. Never change your dose without revisiting your grind: the two are inseparable. Under-dosing creates hollow, channelled extraction; over-dosing creates excessive resistance and can blow channels through the puck.
2. Extraction Ratio (Yield)
The ratio is the relationship between coffee in (dose) and coffee out (liquid in the cup). The classic espresso ratio is 1:2, so 18 g in and 36 g out. Below 1:1.5 is ristretto territory (concentrated, sweet, short). Above 1:3 is lungo (diluted, acidic, extended). Always weigh by grams, not millilitres, because crema volume makes visual measurement unreliable.
3. Grind Size
Espresso grind is fine, somewhere between caster sugar and fine salt. The grinder is the single most important piece of equipment in your setup. A burr grinder (conical or flat burrs) produces a uniform particle size distribution essential for even extraction. Blade grinders chop unevenly, creating both over-extracted fines and under-extracted coarse particles simultaneously, a bitter-and-sour mess. Grind size is your primary dial for adjusting shot time.
4. Brew Temperature
The SCA definition of espresso puts brew water between 90.5 and 96°C at the point of contact. Golden Cup is a different benchmark altogether, an extraction yield and strength target written for filter brewing. In practice, 92 to 94°C covers most coffees. Light roasts take the top of that range, 94 to 96°C, because their aromatic compounds dissolve less readily. Dark roasts do better at 88 to 91°C, above which carbonised bitterness dominates. A PID lets you set this precisely; without one, temperature is not your lever, so work the grind and the ratio instead.
5. Extraction Time
The classic target window is 25-30 seconds, counted from pump activation to cutoff. Under 22 seconds: likely under-extracted (grind too coarse or dose too low). Over 35 seconds: likely over-extracted (grind too fine or dose too high). Remember: time is an indicator, not a target. The target is hitting your desired yield within the window, with the right flavour.
6. Pressure
The reference figure is 9 bar at the puck, with a tolerance of about one bar. The 15 bar advertised on many home machines is the pump maximum against a closed valve; an over-pressure valve pulls the working pressure back towards 9 bar as soon as water moves through the coffee. Better-equipped machines let you shape that profile, with a soft pre-infusion at 2 to 3 bar wetting the bed before the ramp to 9 bar, which curbs channelling and steadies shot-to-shot consistency. For beginners, a stable 9 bar is plenty.
What kit do you actually need before pulling your first shot?
- Espresso machine: pump-driven (not pod or piston), ideally with a boiler or thermoblock with PID control.
- Burr grinder: the priority investment. At equal budget, spend more on the grinder than the machine.
- Precision scale (0.1 g): for weighing dose in and yield out. Non-negotiable.
- Tamper: matching basket diameter (58 mm most common). Flat base, comfortable weight.
- WDT tool: a fine-needle distribution tool (or a toothpick) to break up clumps before tamping.
- Timer: built into your scale or on your phone.
How do you pull a shot from preheat to cut-off?
- Heat up for 20 minutes minimum: run water through the group head to thermally stabilise both the group and the portafilter.
- Weigh your dose: 18 g (±0.2 g). Grind directly into the basket on the scale.
- WDT distribution: gently stir the grounds in a spiral motion with fine needles or a toothpick to break up clumps. Surface should be level and uniform.
- Tamp: firm, level pressure (approximately 15 kg), perpendicular to the basket, one clean motion. No twist finish needed.
- Lock in and tare: lock the portafilter, place the cup on the scale, tare to zero.
- Pull and observe: start extraction and timer simultaneously. Watch the flow: it should begin after 5-7 s (natural pre-infusion), flow steadily, honey-to-caramel colour.
- Stop at 36 g: cut the pump and check the time. Adjust grind for the next shot if needed.
- Taste and adjust: too sour? Grind finer. Too bitter? Grind coarser. One variable at a time, always.
What is the cup telling you when a shot goes wrong?
| Symptom | Likely cause | Fix |
|---|---|---|
| Shot under 20 s for 36 g | Grind too coarse | Grind finer by one step |
| Shot over 35 s for 36 g | Grind too fine or dose too high | Grind coarser; check dose |
| Sour, salty, flat taste | Under-extraction | Finer grind OR +1°C temperature |
| Bitter, harsh, astringent | Over-extraction | Coarser grind OR −1°C temperature |
| Thin, grey crema | Stale coffee (>3 months post-roast) | Fresh lot; check roast date |
| No crema at all | Too fresh (<5 days) or water too cool | Wait for degassing; check temperature |
| Uneven flow, spurting | Channelling (uneven puck) | Rework WDT and tamping technique |
| Cold cup despite hot shot | Cup not preheated | Run hot water through cup before pulling |
Which habits quietly ruin espresso at home?
- Blade grinder: heterogeneous grind produces bitter-and-sour shots simultaneously. The worst possible starting point for espresso.
- Measuring by volume: crema creates massive variation. 36 ml is not 36 g. Always weigh grams out.
- Hard tap water: limescale builds up in the boiler and changes how the shot extracts. Filtered, lightly mineralised water is enough to start with.
- Tilted tamping: an uneven puck creates channelling. Always perpendicular, always stable.
- Changing two variables at once: you will never know which one made the difference. One adjustment per shot.
- Neglecting cleaning: coffee oils go rancid in the basket and gaskets. Backflush weekly, deep-clean the portafilter monthly.
The single best upgrade most home baristas can make is not a new machine, it is a better grinder. A mediocre machine with an excellent grinder will consistently outperform an excellent machine paired with a mediocre grinder. This is the one rule that changes everything.
What can you try once your base recipe is repeatable?
- Long pre-infusion: 8 to 15 s at 2-3 bars before ramping. Reduces channelling, ideal for light roasts.
- Declining pressure profile: start at 9 bar, taper to 6-7 bars. Reduces late-extraction bitterness.
- Turbo shot: very coarse grind, 1:3 to 1:4 ratio in 15-20 s. Efficient extraction at high flow. Growing in competition circles.
- Ristretto: 1:1.5 ratio, maximum concentration and sweetness. Works beautifully with Central American origins.
Our picks
Run the numbers before you buy. Three café coffees a day at €3.50 comes to about €3,800 a year. A Sage Barista Express Impress plus a Timemore Black Mirror Nano lands around €700 at September 2026 prices; replace just one of those three with a shot pulled at home and, once you subtract the cost of the beans, the kit pays for itself in roughly eight months. The financial case is only half of it, though. The Sage narrows the skill gap because its PID, integrated conical burr grinder and assisted tamping take three of the hardest variables off your hands at once. The Timemore Nano closes the loop: it reads to 0.1 g up to 2 kg, so you can watch the shot build in real time instead of guessing at the yield.
View Sage Barista Express on Amazon →Quick comparison
* These links may generate a commission if you make a purchase, at no extra cost to you. Learn more.
Affiliate links: as an Amazon Associate, expertcafe.be earns from qualifying purchases at no extra cost to you. Learn more.